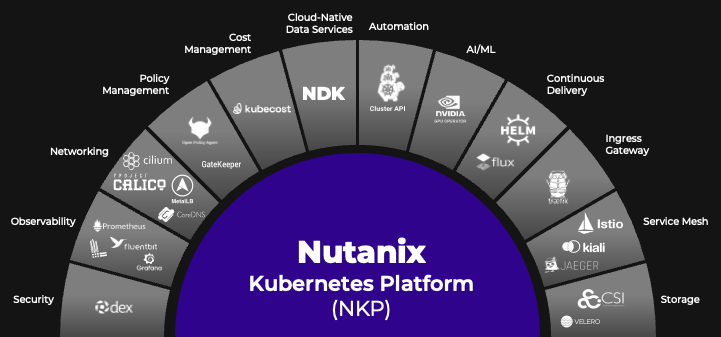
Nutanix Kubernetes Platform, how to install (Part 2 of many)
How to install Nutanix KubernetesPlatform?
Resource Requirements
Sizing of your cluster depends on the workload. However minimum requirements are listed. These minimum requirements will be used when deployment will take place with the default settings.
| Resources | Control Plane Nodes | Worker Nodes |
|---|---|---|
| minimum node requirement | 3 | 4 |
| vCPU count | 4 | 8 |
| Memory | 16 GB | 32 GB |
| Disk Volume | Approximately 80 GiB: Used for /var/lib/kubelet and /var/lib/containerd | Approximately 95 GiB: used for /var/lib/kubelet and /var/lib/containerd |
| Root Volume | Disk usage must be below 85% | Disk usage must be below 85% |
Installation Prerequisites
There are several prerequisites before you can install NKP. The operator machine must be a Linux machine or a MacOS machine.The following is required. Listing is not complete. For all prerequisites you should read the ‘ Nutanix Kubernetes Platform Guide‘ .
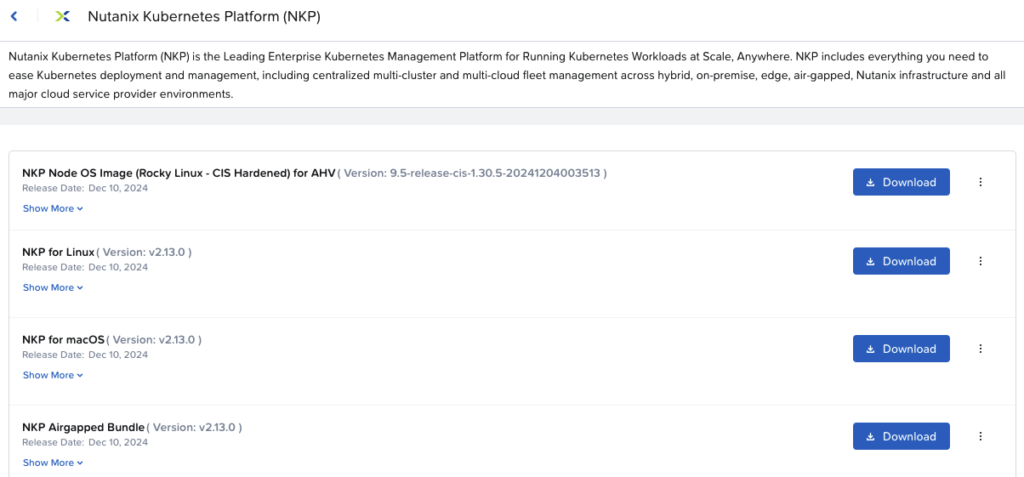
- NKP binary, downloaded from the Nutanix download site. (Select the appropriate bundle depending on the operator machine.)
- A container engine or runtime installed is required to install NKP and bootstrap:
- Docker container engine version 18.09.2 or 20.10.0 installed for Linux or MacOS
- Podman Version 4.0 or later for Linux
- kubectl for interacting with the cluster running on the host where the NKP Konvoy CLI runs.
- some additional requirements for your environment (AWS, GCP, Azure, EKS, AKS)
When installing an air-gapped environment, your environment is isolated. Some additional prereqs are needed.
- Linux machine (bastion) that has access to the existing Virtual Private Cloud (VPC) instead of an x86_64-based Linux or macOS machine.
- Ability to download artifacts from the internet and then copy those onto your Bastion machine.
- An existing local registry to seed the air-gapped environment
- Download the complete NKP air-gapped bundle
NKP-air-gapped-bundle_v2.12.0_linux_amd64.tar.gzfor this release
Infrastructure requirements
Depending on the infrastructure you are installing NKP on. you have some prerequisites. This paragraph only has some prerequisites / remarks on Nutanix infrastructure. Full list is on the documentation site.
- NKP 2.12 is supported with Prism Central versions 2024.1 and 2024.2
- NKP 2.12.x that ships with Nutanix CSI 3.0 is incompatible with Prism Central 2024.3. You must upgrade NKP 2.12.x to NKP 2.13 before upgrading to Prism Central 2024.3.
- Nutanix Prism Central version 2024.1 has role credentials configured with administrator privileges
- AOS 6.5, 6.8, 6.10 and later
- Access to a bastion VM or other network-connected host running Konvoy Image Builder.
- Nutanix provides a full image built on Nutanix with base images if you do not want to create your own from a BaseOS image.
- You must be able to reach the Nutanix endpoint where the Konvoy CLI runs.
Installation
At a high level, installing NKP involves the following steps.
- Connecting to the bootstrap host.
- Verifying the container service.
- Minimum version of Docker is 18.09.2. If using Prodman, you should use 4.0 or later.
- Commands to be issued:
docker –version
sudo systemctl status docker | cat –
- Verifying the Kubernetes CLI.
- You should use version 1/28.x or later for successful NKP deployments.
- Command to be issued: kubectl version –short
- Downloading the NKP air-gapped bundle
- This bundle should be downloaded for air-gapped installations.
- Bunble can be found at the download portal of Nutanix. (See above.)
- Configuring the NKP CLI
- Extract the airgapped bundle. ‘tar -zxvf nkp-air-gapped-bundle_v2.12.0_linux_amd64.tar.gz‘
- After the NKP air-gapped bundle is extracted, change the directory to nkp-v2.12.0/cli using the cd nkp-v2.12.0/cli command.
- After changing the directory, confirm that the nkp binary is available using the ls -al command.
- Verify the nkp version using the ./nkp version command to make sure that we are using 2.12.
- To simplify further commands, add the /nkp-v2.12.0/cli directory to our PATH. ‘echo “PATH=$PATH:$(pwd)” >> ~/.bashrc‘
- Setting up a local registry
- If Docker is used, the registry of docker can be used.
- It can be useful to store the IP address of the bootstrap host in an environment variable.
- Seeding the NKP images to the local registry.
- First, on the bootstrap host, we are going to add the URL of the local registry to a persistent environment variable using the following command:
echo “export REGISTRY_URL=http://<Bootstrap Host IP>:5000” >> .bashrc
After the local registry is added to the bootstrap host, we are going to reload the .bashrc file using the source .bashrc command. - After reloading the .bashrc file, we will change the directory on the bootstrap host to /home/nutanix/nkp-v2.12.0/container-images using this command:
cd /home/nutanix/nkp-v2.12.0/container-images
After the directory is changed, run the ls -al command to review the image bundles as highlighted in the figure below. - Now, we will seed the Kommander, Konvoy, and NKP catalog applications image bundles to the local registry. Seeding these image bundles to the local registry will allow you to use them to build a machine image.
- The next step is to create a bootstrap Kubernetes-in-Docker (KIND) cluster using the Konvoy bootstrap image and build a machine image using the NIB image for the NKP control plane and worker nodes.
Before we proceed, we need to load the images to the docker image registry. Run the following command to load the Konvoy bootstrap image:
docker load -i konvoy-bootstrap-image-v2.12.0.tar
Then, run the following command to load the NIB image:
docker load -i nkp-image-builder-image-v0.13.1.tar
Finally, run the docker image ls command to confirm that the images have been loaded to the docker image repository. If the images have loaded successfully, the output should look similar to the following figure.
- First, on the bootstrap host, we are going to add the URL of the local registry to a persistent environment variable using the following command:
- Creating a bootstrap Kubernetes-in-Docker (KIND) cluster.
- First, on the bootstrap host, create a KIND bootstrap cluster using the nkp create bootstrap command.
- After the bootstrap cluster has been created, run the docker ps command to verify that the bootstrap cluster is running on the bootstrap host.
- After the KIND cluster has been created, we are going to run the kubectl get nodes command to retrieve information about the KIND cluster.
- After you run the kubectl get nodes command, you can run the kubectl describe nodes command to view detailed information about the KIND cluster.
- Next, we will view all controller pods running on the KIND cluster using the following command:
kubectl get pods –all-namespaces
- Building a machine image.
- On the bootstrap host, run the following echo commands sequentially to set the required environment variables.
echo “export NUTANIX_USER=admin” >> ~/.bashrc
echo “export NUTANIX_PASSWORD=Nutanix/4u” >> ~/.bashrc
echo “export PE_CLUSTER_NAME=MY-PE” >> ~/.bashrc
echo “export PC_ENDPOINT=172.31.2.110” >> ~/.bashrc
echo “export SUBNET=NKP-Subnet” >> ~/.bashrc
After setting the environment variables, run the source ~/.bashrc command to reload the .bashrc file. - Run the env command to verify that the variables have been configured correctly.
- Now that the environment variables have been configured, we need to create an OS image. In this step, NIB will download the base image for the selected OS and create a new VM in Prism Central using the base image. Then, NIB will run a series of steps to install all the components that NKP needs. When the installation is complete, NIB will add the final image to Prism Central for consumption.
In this example, we will create an Ubuntu-22.04 image using the following command:
nkp create image nutanix ubuntu-22.04 –cluster=$PE_CLUSTER_NAME –endpoint=$PC_ENDPOINT –subnet=$SUBNET –insecure - Note: Ubuntu is not supported by the NKP Starter license. It is only supported by the NKP Pro and Ultimate license tiers.
- After the image creation is successful, we are going to run the following echo command to save the newly created Ubuntu image’s name highlighted in the figure above as an environment variable.
echo “export VM_IMAGE=<nkp-ubuntu-22.04-1.29.6-20240930172843>” >> ~/.bashrc
After setting the above environment variable, run the source ~/.bashrc command to reload the .bashrc file.
- On the bootstrap host, run the following echo commands sequentially to set the required environment variables.
- Creating a management cluster
- First, we will run the following echo commands sequentially to set the required environment variables to create a management cluster.
echo “export MGMT_CLUSTER_NAME=flying-eagle” >> ~/.bashrc
echo “export MGMT_CP_ENDPOINT=<MGMT Cluster CP Endpoint>” >> ~/.bashrc
echo “export STORAGE_CONTAINER=NKP-Container” >> ~/.bashrc
echo “export MGMT_LB_IP_RANGE=<MGMT Cluster LB IP Range>” >> ~/.bashrc
After setting the environment variables, we are going to run the source ~/.bashrc command to reload the .bashrc file. Then, we will run the env command to verify that all the variables are configured correctly. - Next, we will generate the cluster manifest that includes resource definitions required for the management cluster. The command below will allow us to customize some of the parameters in the manifest file, which in turn will determine the configuration of the management cluster. For example, for vCPUs, the default is 4 and we are changing it to 8.
To generate the cluster manifest, we will run the following command:
nkp create cluster nutanix \
–cluster-name=$MGMT_CLUSTER_NAME \
–control-plane-prism-element-cluster=$PE_CLUSTER_NAME \
–control-plane-subnets=$SUBNET \
–control-plane-endpoint-ip=$MGMT_CP_ENDPOINT \
–control-plane-vm-image=$VM_IMAGE \
–control-plane-memory=8 \
–control-plane-vcpus=8 \
–control-plane-replicas=1 \
–worker-prism-element-cluster=$PE_CLUSTER_NAME \
–worker-subnets=$SUBNET \
–worker-vm-image=$VM_IMAGE \
–worker-memory=16 \
–worker-replicas=3 \
–csi-storage-container=$STORAGE_CONTAINER \
–kubernetes-service-load-balancer-ip-range=$MGMT_LB_IP_RANGE \
–endpoint=”https://$PC_ENDPOINT:9440(opens in a new tab)” \
–insecure=true \
–registry-mirror-url=$REGISTRY_URL \
–ssh-public-key-file=$SSH_PUBLIC_KEY \
–dry-run \
–output=yaml > deploy-nkp-$MGMT_CLUSTER_NAME.yaml - Deploy NKP using the following command:
kubectl create -f deploy-nkp-$MGMT_CLUSTER_NAME.yaml
- After the deployment is complete, we create a Kubernetes configuration file for the management cluster. To do this, we will run the following commands sequentially.
cd ~
nkp get kubeconfig –cluster-name $MGMT_CLUSTER_NAME > $MGMT_CLUSTER_NAME.conf
Then, we are going to run the ls -lh *.conf command to verify if the config file has been created successfully. - After the config file has been created, we will restrict access to it using the following command:
chmod 600 $MGMT_CLUSTER_NAME.conf - Then, we will set the KUBECONFIG environment variable to the Kubernetes configuration file for the management cluster.
To set the KUBECONFIG environment variable, we are going to run the echo command.
echo “export KUBECONFIG=~/$MGMT_CLUSTER_NAME.conf” >> ~/.bashrc
After the environment variable is set up, we will reload the .bashrc file using the source .bashrc command. - Now that Kubernetes CLI has been set up to interact with the management cluster, let’s check the health of the control plane and worker nodes using the kubectl get nodes command.

- Next, we will deploy CAPI components on the management cluster and move all Controllers from the bootstrap KIND cluster to the management cluster.
To do this, first, we will create CAPI components on the management cluster using the following command:
nkp create capi-components - After the CAPI components are deployed on the management cluster, we will unconfigure the KUBECONFIG variable using the unset KUBECONFIG command. This will connect the Kubernetes CLI back to your bootstrap KIND cluster.
Then, we will verify that the Kubernetes CLI is connected to the bootstrap KIND cluster using the kubectl get nodes command. You should now see the bootstrap cluster node instead of the nodes in the management cluster as shown in the following figure. - After we have unconfigured the KUBECONFIG variable, we will change the management cluster to a self-managed management cluster. To do this, first, we will move all the CAPI controllers from the bootstrap KIND cluster to the management cluster using the following command:
nkp move capi-resources –to-kubeconfig $MGMT_CLUSTER_NAME.conf - After the controllers have been moved, the management cluster becomes self-managed. At this point, we can remove the bootstrap KIND cluster using the nkp delete bootstrap command.
- After the bootstrap cluster has been deleted, we will connect to the management cluster and review the configuration. To do this, first, we are going to reload the .bashrc file using the source ~/.bashrc command. Then, verify that we are connected to the management cluster using the kubectl get nodes command.
- Next, we will view all the namespaces on the management cluster using the kubectl get ns command. All CAPI namespaces and the cert-manager namespace that were moved from the bootstrap KIND cluster to the management cluster are displayed.
- After viewing the CAPI namespace, we will now view the pods in the Kommander namespace using the following watch command:
watch kubectl get pods -n kommander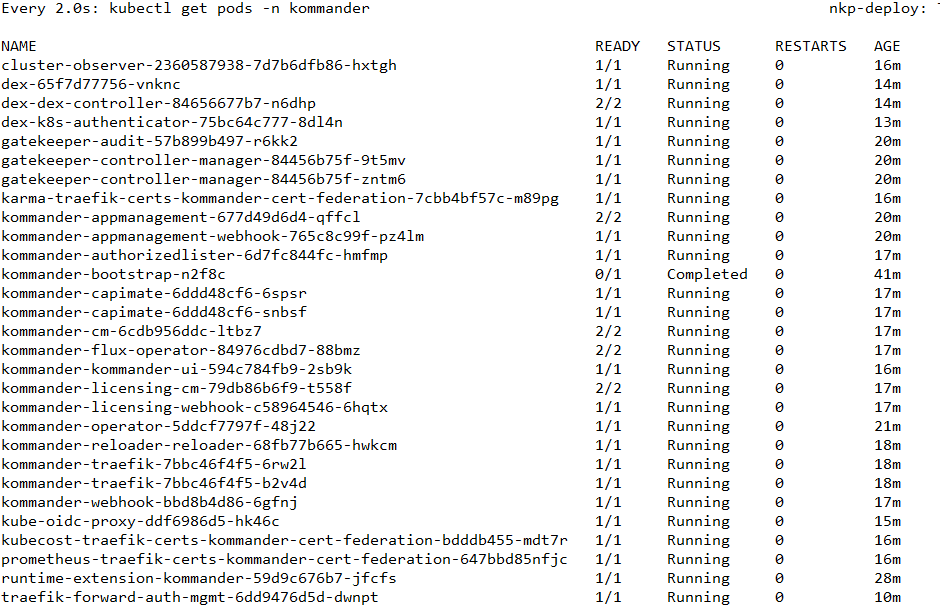
The installation takes approximately 10 to 12 minutes to complete. Do not continue until all pods are running. - After all the pods listed in the figure above are running, press CTRL+C to return to the shell prompt to obtain the Kommander URL and credentials. To this do, we are going to run the nkp get dashboard command.
- First, we will run the following echo commands sequentially to set the required environment variables to create a management cluster.
The process described is for an air-gapped environment. Installing NKP in an Non-Air-gapped environment is almost the same but some steps are missing.
Downloading the air-gapped bundle, configuring a registry, and seeding images to the registry are missing. This is because, since internet connectivity is available, all images can be downloaded directly as part of the installation process.
Leave a Reply