Part 2: Performing basic configuration steps
This post is a follow-up of part 1, where we deployed the Hycu appliance. If you missed that post, just click here to read it. In this second part, the basic configuration of the Hycu backup controller is performed.

When the installation of the Hycu backup controller has succeeded, you can navigate to the Hycu Management interface using the address.
https://[IP address or FQDN]:8443
First time, you have to logon with the username ‘admin’ and the password ‘admin’.
After a successful login, you are going to see (not surprisingly) an empty dashboard.
Under the Hycu controller, you immediately see a warning that the Controller is not protected. Another warning indicates that the Nutanix is not yet added as a source.
Don’t worry, we will take care of that really soon.

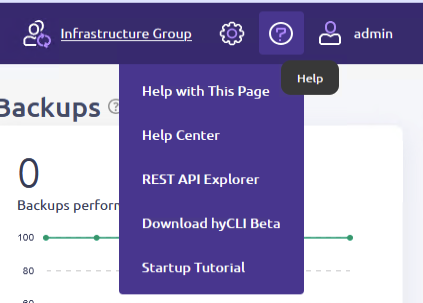
Another thing that might catch your attention is the tutorial at the bottom right of the screen.
This tutorial will make sure, the most important tasks are taken care of.
This post will take care of the first three steps in a moment.
If you close the tutorial by accident, you can always bring it back.
Just click on the question mark in the top of the screen, and you can select the ‘Startup tutorial’ again.
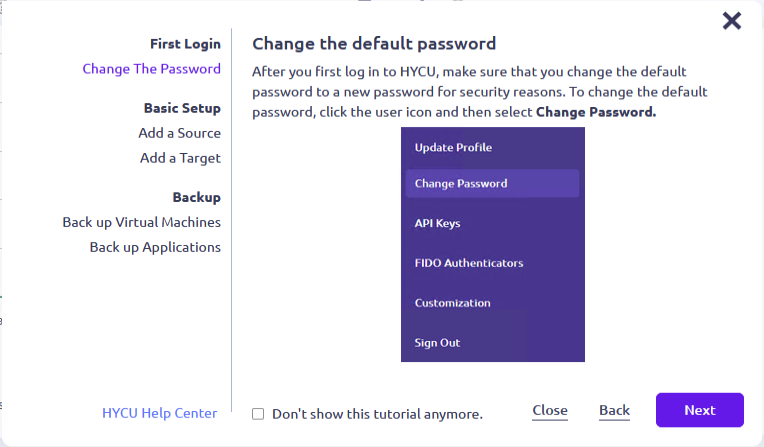
First task in the Quickstart tutorial is to get rid of the default password of the user ‘admin’.
To change the password, click on the user icon on the top right and select ‘Change Password’ from the pop-up menu.
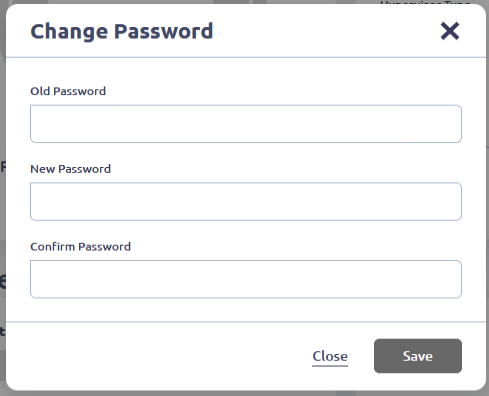
A new pop-up appears and the process of changing the password is really straightforward.
Just enter the old password and create a new one.
As admin is the only account, it is best practise to add an Identity Provider at a later stage, so you can used named accounts.
As Identity Providers are supported:
Active Directory, AD FederationServices, Google, Keycloak, Entra ID, Okta, OpenID Connect and LDAP.
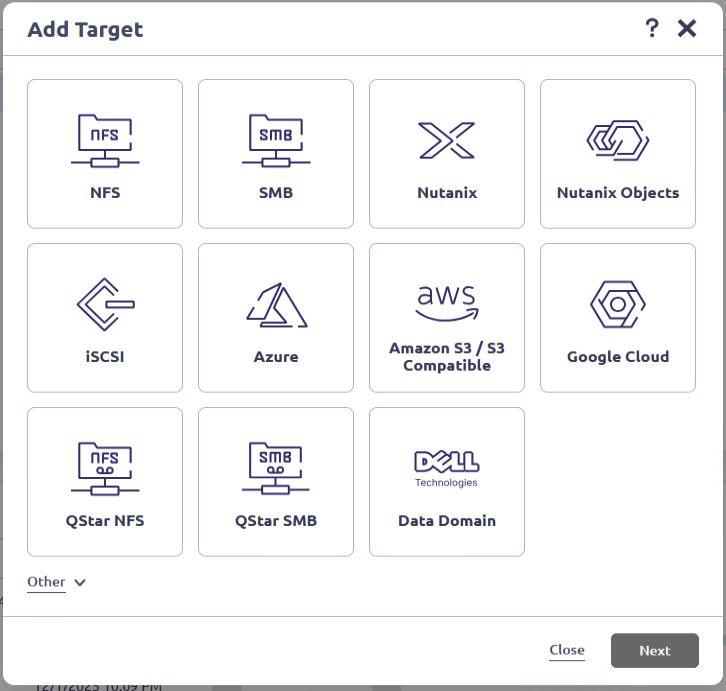
After changing the password, you have to add an target, where Hycu can save the backup data. In the picture to the right, you see several options you can use.
For the primary backup, it is wise to choose a destination from where you can recover rapidly.
For this environment I have chosen to protect my data on Nutanix.
My target is on the same clusters as the entities to be protected. Nice for a demo environment. I would never recommend that for production workloads.
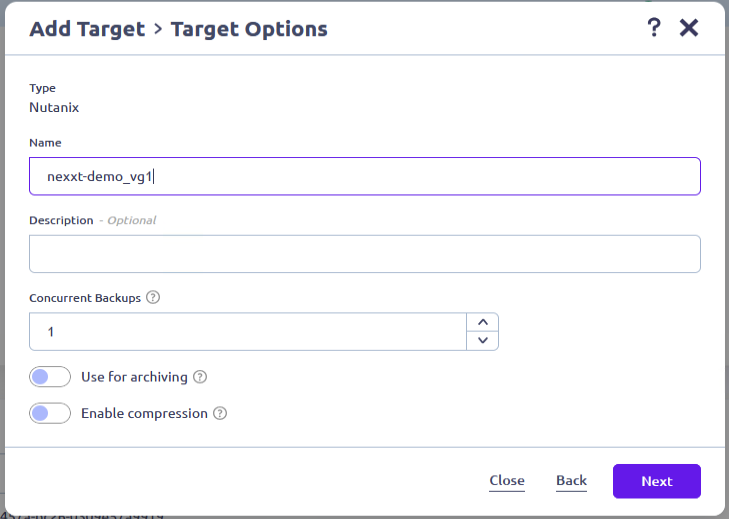
When creating a Nutanix target, you should as with any other target give it a name.
Because a Nutanix target will be a volume group on the cluster, I added _vg1 to the name of the cluster.
You never know if more targets are going to be created.
If primary backups are going to the target, do not enable ‘Use for archiving’ as Hycu does not allow a target to be used for backup and archiving jobs.
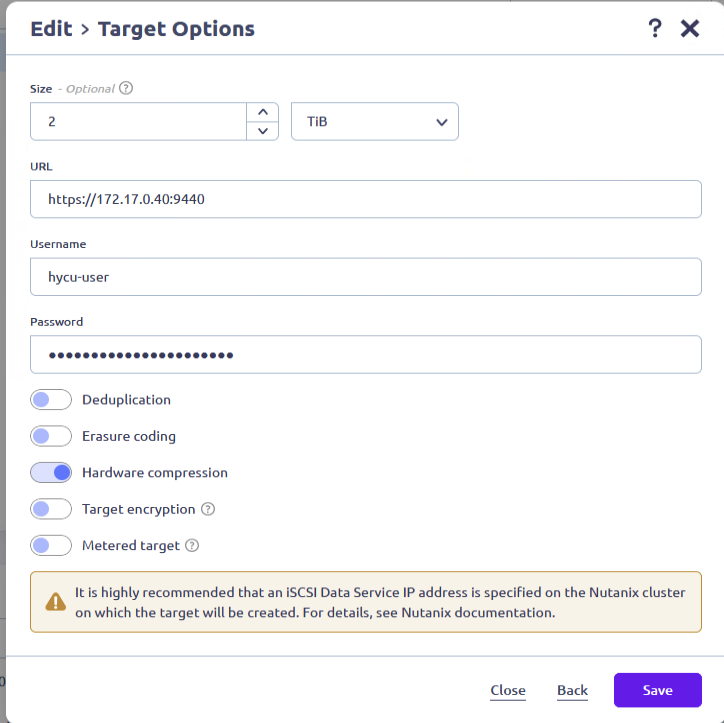
In the second screen for creating a Nutanix target, you can specify the size of the volume group. I recommend to specify the size to make sure your Nutanix cluster cannot run out of space.
If the first target is full, you can just create another one.
For the URL, it is recommended to use the Data Service IP (DSIP), so Hycu connects to this IP for the iSCSI connection.
You can find or set the DSIP in Prism Element or the command ‘ncli cluster info’ while connected to the CVM with ssh.
If you click ‘Save’ then the target is created.
When you are in Prism Central, you see a task ‘Create Volume Group’ with the username you specified as the initiator of the job.
Note: If you delete a Nutanix Target from the Hycu Interface, then a task ‘ Delete Volume Group’ will appear in Prism Central.
To be sure that you don’t delete a target that is still in use, Hycu does not let you delete such a target.
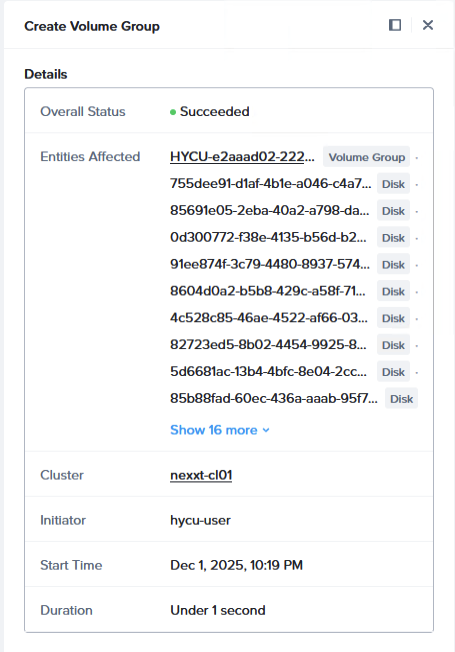
Finally, when the task is completed in Nutanix, the new target appears in the list.

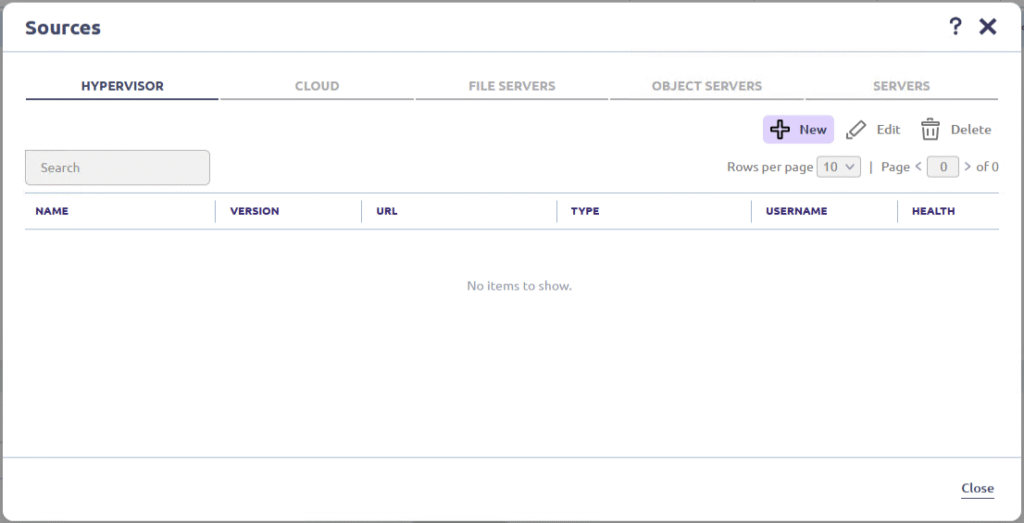
Now we have a target for our backup data, it is time to add a source. We are going to add a Nutanix cluster to the Hycu controller.
In the interface, click the gear icon, and select sources.
First source that we will add to Hycu is a hypervisor. So, go to the hypervisor panel and click ‘New’.
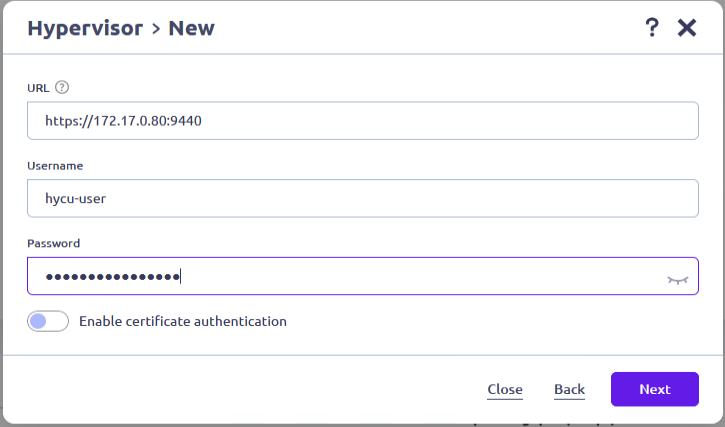
For the URL, just use the cluster VIP of the Nutanix cluster. Don’t forget to add port 9440. Otherwise, the Hycu controller is unable to connect.
The user specified for the connection needs administrative cluster permissions.
So the role ‘Cluster Admin’ must be granted to this user.
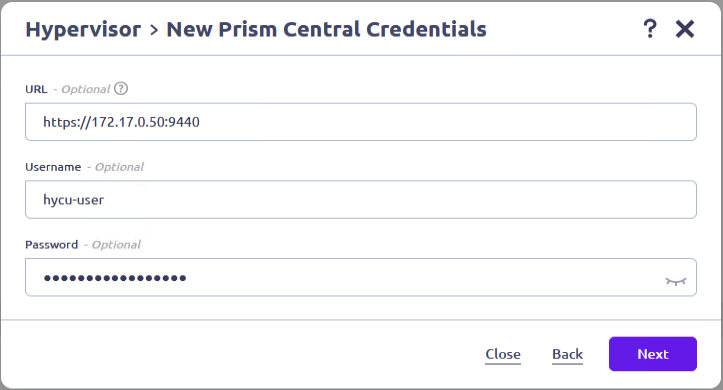
When the cluster is added to Prism Central (and nowadays every Nutanix cluster must be for licensing purposes), you can enter the details here.
I encourage you to enter the credentials. Doing so enables you to use PC Categories within the Hycu policies.
More about that in part 3 of this series.

When validation is successful, you can save the configuration.
Again is the recommendation shown to use a Data Services IP Address in the cluster. That is not unique to Hycu. Every backup vendor recommends to do so.
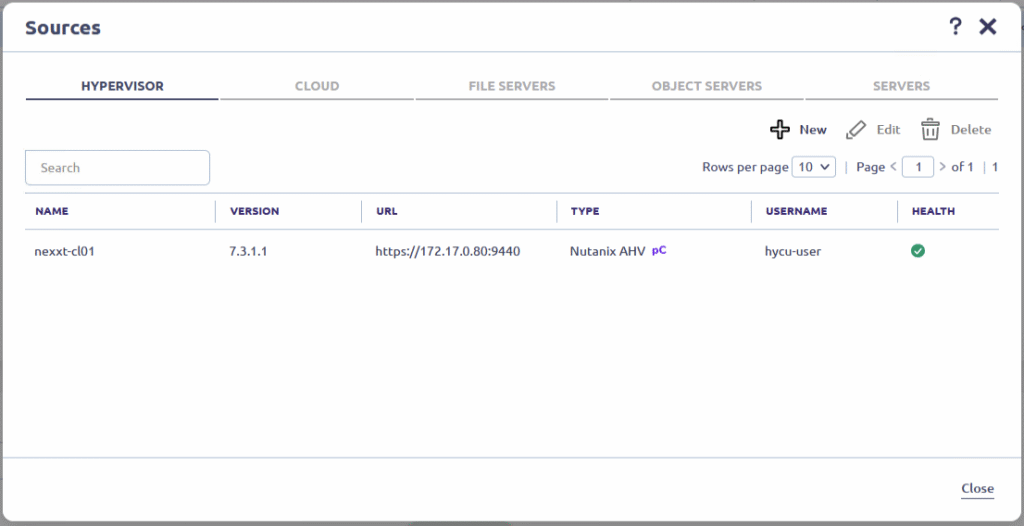
After saving, the cluster appears in the list of sources.
So, the basic configuration is done. This concludes this post. In the next part we will have a look at the back-up policies within Hycu. Stay tuned.
Leave a Reply