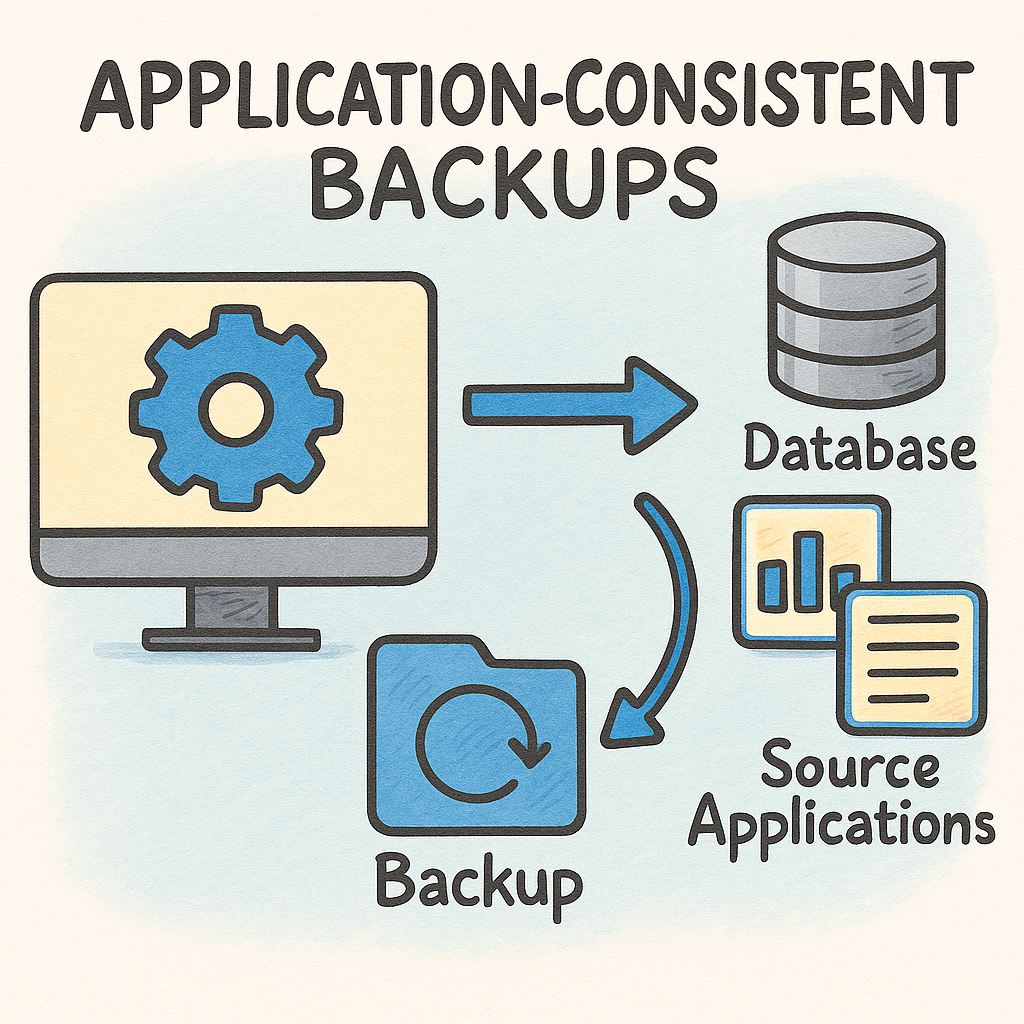
I don’t have to explain that creating regular backups for virtual machines (and other data sources) are critical to an organization. Are app consistent backups of Linux VMs really needed? Well, of course this depends on the workloads on that Linux VM. However, I see many backup tools are creating app consistent backups by default. If you don’t prepare your virtual machines for that, you have to resolve multiple alerts per day. To prevent those alerts, just follow the steps in this post.
There are two main requirements to create application consistent snapshots. One of them is the Nutanix Guest Tools. This post will also pay some attention to install the Nutanix Guest Tools (NGT). Second requirement is the presence of the pre_freeze and post_thaw scripts on the Linux VM.
Installation of the Nutanix Guest Tools
To install the NGT on Linux, you have to perform a few steps. You can also read them in the Prism Element documentation.
When you notice in Prism Central that NGT is not yet installed, you are able to setup the NGT using the wizard. See the screenshots below. You have to select the VSS application of the NGT to be able to create app-consistent recovery points. Enablement of the Self Service Restore is not necessary. In this example, the NGT is mounted on the VM and you need to perform the actual software installation by yourself.


To install the NGT, just open a terminal session to your Linux server. Mount the attached iso to the filesystem and perform the installation.
badonders@nexxt-lx002:~$ blkid -L NUTANIX_TOOLS
/dev/sr0
badonders@nexxt-lx002:/mnt$ sudo mount /dev/sr0 /mnt/iso
mount: /mnt/iso: WARNING: source write-protected, mounted read-only.
badonders@nexxt-lx002:/mnt$ sudo python /mnt/iso/installer/linux/install_ngt.py –operation install
[2025-12-22 14:43:59] {install_ngt.py:61} INFO – Executing command: which rpm
[2025-12-22 14:43:59] {install_ngt.py:81} INFO – Output: /bin/rpm
[2025-12-22 14:43:59] {install_ngt.py:61} INFO – Executing command: which dpkg
[2025-12-22 14:43:59] {install_ngt.py:106} WARNING – Dpkg command failed due to error : which dpkg failed, Status code:1, Output:”, Error:’which: no dpkg in (/sbin:/bin:/usr/sbin:/usr/bin)\n’
[2025-12-22 14:43:59] {install_ngt.py:61} INFO – Executing command: sh /mnt/iso/installer/linux/ngt_rpm_installer/ngt_install_upgrade.sh
[2025-12-22 14:44:48] {install_ngt.py:81} INFO – Output: Current Directory: /mnt/iso/installer/linux/ngt_rpm_installer
There is a lot more output after the install command.. No need to paste that all in here. After the installation you can check the status of the service.
badonders@nexxt-lx002:/mnt$ sudo systemctl status ngt_guest_agent.service
● ngt_guest_agent.service – Starts, stops Nutanix Guest Agent.
Loaded: loaded (/etc/systemd/system/ngt_guest_agent.service; enabled; preset: enabled)
Active: active (running) since Mon 2025-12-22 14:44:46 CET; 28s ago
Invocation: 8cef3fb6d0bf4e41b895adcee6a7c687
Main PID: 143209 (python3)
Tasks: 17 (limit: 21452)
Memory: 53.1M (peak: 63.9M)
CPU: 31.889s
CGroup: /system.slice/ngt_guest_agent.service
├─143209 /usr/local/nutanix/ngt/python311/python3 -E /usr/local/nutanix/ngt/python/bin/guest_agent_monitor_linux.py
└─143215 /usr/local/nutanix/ngt/python311/python3 -E /usr/local/nutanix/ngt/python/bin/guest_agent_monitor_linux.py
Dec 22 14:44:44 nexxt-lx002 systemd[1]: Starting ngt_guest_agent.service – Starts, stops Nutanix Guest Agent….
Dec 22 14:44:44 nexxt-lx002 ngt_guest_agent[143207]: Mon Dec 22 02:44:44 PM CET 2025 : Starting Nutanix Guest Agent daemon.
Dec 22 14:44:46 nexxt-lx002 ngt_guest_agent[143280]: Mon Dec 22 02:44:46 PM CET 2025 : guest agent service started with pid 143209 143215.
Dec 22 14:44:46 nexxt-lx002 systemd[1]: Started ngt_guest_agent.service – Starts, stops Nutanix Guest Agent..
Dec 22 14:44:47 nexxt-lx002 systemd[1]: /etc/systemd/system/ngt_guest_agent.service:9: PIDFile= references a path below legacy directory /var/run/, updating /var/run/ngt_guest_agent.pid → /run/ngt_guest>
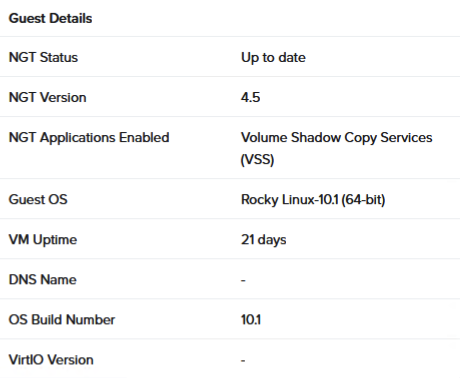
In Prism Central you will see something like the screenshot to the left.
Now the NGT is installed successfully, we can pay attention to the needed scripts for a successful app-consistent back-up. As mentioned earlier, we need to have two scripts. One script is executed before the snapshot is taken, the second one is executed just after the creation of the snapshot.
There are a few requirements for the two scripts.
- the scripts are named pre_freeze and post_thaw.
- the scripts are placed in the directory /usr/local/sbin.
- the scripts have the owner root and the permissions 700.
Depending on the workload of your linux vm, the scripts are filled with commands. If you are running a mysql server, you may want to dump the database, before creating the snapshot. Maybe you need to stop a service in the pre_freeze script to ensure that data is consistent. Just don’t forget to start the service in the post_thaw script.
Normally I use two simple scripts that just add an entry to a logfile, and that’s it. Then I return an exit code 0, so NGT knows the action is successful.
Below you can find the content of my default (blank) scripts.
/usr/local/sbin/pre_freeze
!/bin/sh
echo “$(date) – Pre-Freeze Started” >> /var/log/vmbackup.log
exit 0
/usr/local/sbin/post_thaw
!/bin/sh
echo “$(date) – Post thaw started” >> /var/log/vmbackup.log
exit 0
In the following set of commands you see the implementation and the results. Probably there are other and more safer ways for the same result, but that is still work in progress. Still have a lot to learn about this.
badonders@nexxt-lx002:/usr/local/sbin$ sudo touch pre_freeze
badonders@nexxt-lx002:/usr/local/sbin$ sudo touch post_thaw
badonders@nexxt-lx002:/usr/local/sbin$ sudo chmod 700 pre_freeze
badonders@nexxt-lx002:/usr/local/sbin$ sudo chmod 700 post_thaw
badonders@nexxt-lx002:/usr/local/sbin$ ls -l
total 0
-rwx——. 1 root root 0 Dec 22 14:49 post_thaw
-rwx——. 1 root root 0 Dec 22 14:49 pre_freeze
badonders@nexxt-lx002:/usr/local/sbin$ sudo vi pre_freeze
badonders@nexxt-lx002:/usr/local/sbin$ sudo vi post_thaw
badonders@nexxt-lx002:/usr/local/sbin$ sudo cat pre_freeze
!/bin/sh
echo “$(date) – Pre-Freeze Started” >> /var/log/vmbackup.log
exit 0
badonders@nexxt-lx002:/usr/local/sbin$ sudo cat post_thaw
!/bin/sh
echo “$(date) – Post thaw started” >> /var/log/vmbackup.log
exit 0
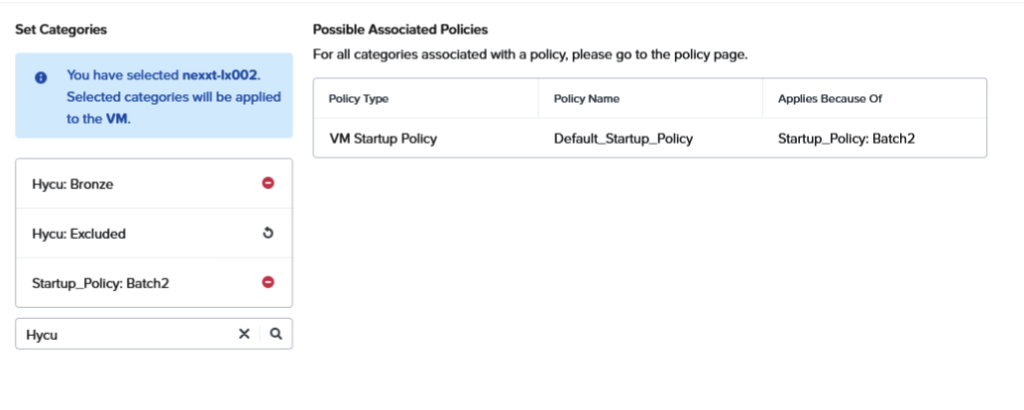
When the scripts are in place, it is time to create a backup. In my setup, backups are created by Hycu. To fill the policies in Hycu, categories within Prism Central are used. In the example below, the VM is added to the category for the Bronze policy. This change is reflected in Hycu and shortly after the VM is added to the Bronze policy, a back-up is created.
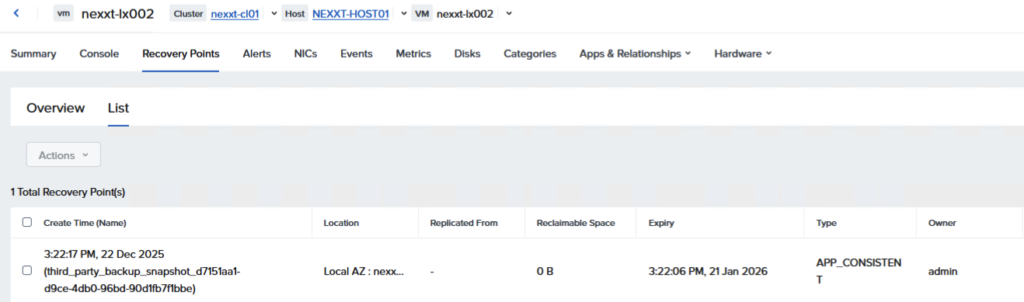
No alerts are generated within Prism Central and when looking at the recovery point, you will notice that an App consistent recovery point is created.

So, even when application consistent backups are not really needed, it makes sense to make sure the virtual machine can be protected using app consistent recovery points. It is easy to do, and you don’t have to create different policies within the backup tool to make sure everything is working without generating alerts.
Leave a Reply