
This blogpost will show you how to install Nutanix Files using Prism Central. But before we are going to install Nutanix Files, let’s first look what Nutanix Fules really is.
What is Nutanix Files?
Well, Files a software-defined, scale-out file storage solution that lets you share files in a centralized and protected location.
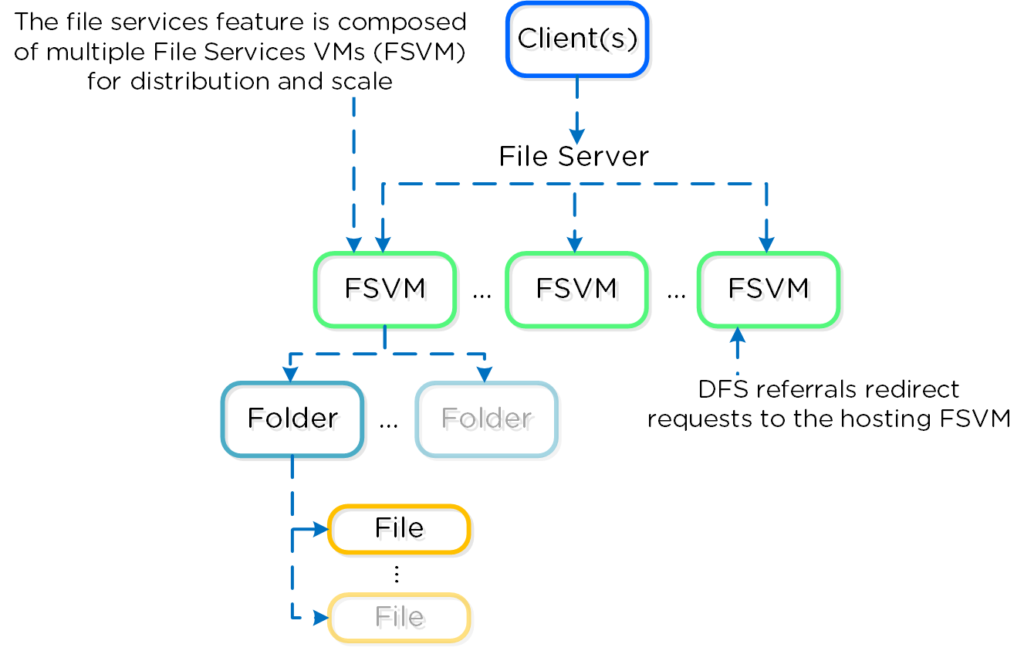
Nutanix Files eliminates the requirement for a third-party file server and uses a scale-out architecture that provides file services to clients through the Server Message Block (SMB) and Network File System (NFS) protocols. A logical file server instance, sometimes referred to as a Files cluster, consists of one or more file server VMs (FSVMs), which encompass shares and exports.
This Nutanix Files server is highly available and well performing. You are able to update the Files Server with a minimum of impact, as you are with Nutanix AOS.
Your client is completely unaware of the 3 (or more) File Server VMs. All FSVMs are registered within DNS with the name of the File Server, so not the VM name. So, using DNS the client is connecting to one of the FSVMs.
If needed are requests from clients redirected to the hosting FSVM.
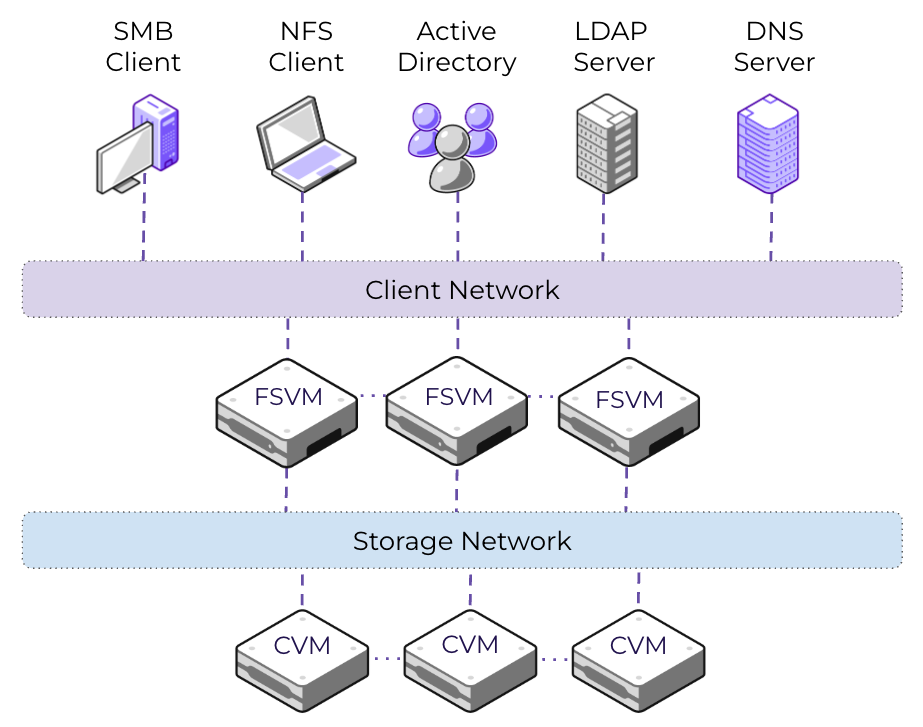
Each File Server VM has two network connections. The client network is used for the external connectivity.
Each File Server VM needs one IP address in this network. Most of the backup applications are using this client network IP address for data protection using the ‘Changed File Tracking’ API. Good to know when designing Nutanix Files. You don’t want to get the firewall involved when making backups.
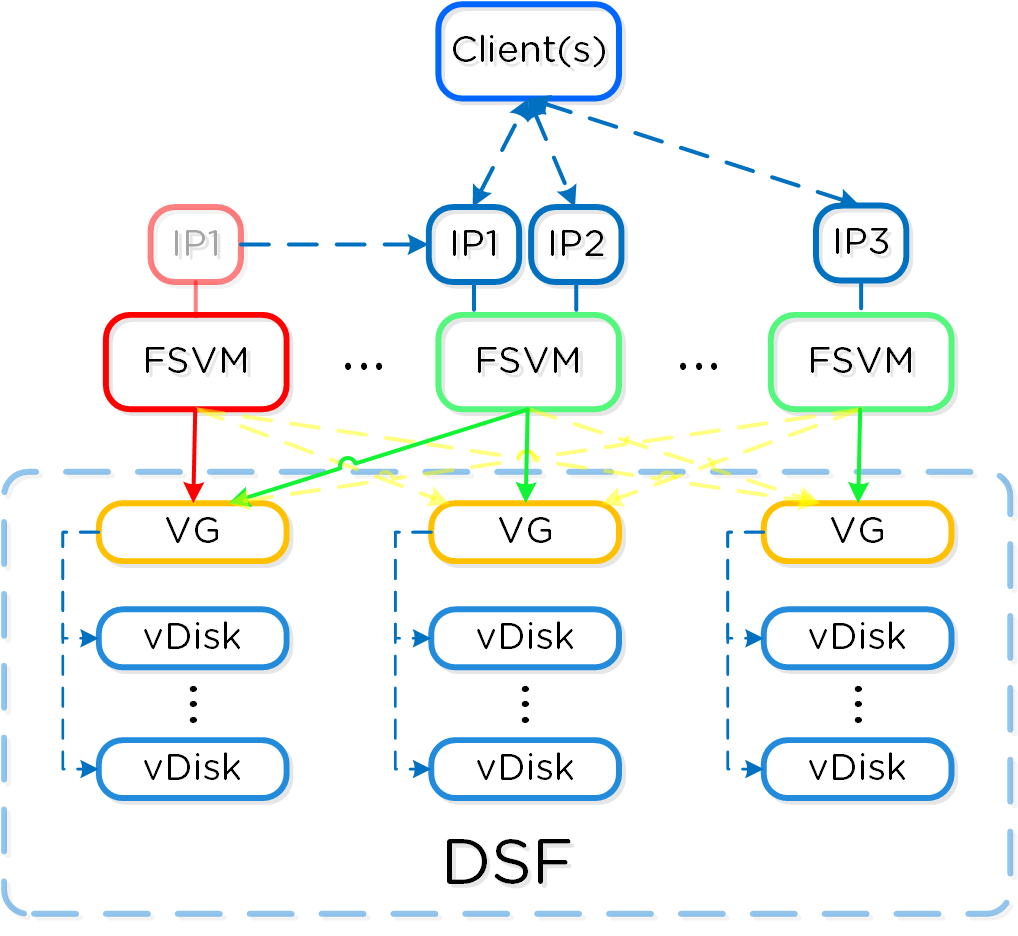
The storage network is the communication between the File Server VMs and the Controller VMs of your Nutanix cluster. All iSCSI connections for the FSVMs are created over this network.
In case of unavailability of a FSVM, another one will handle the IP adddress and the volume groups of the impacted FSVM. This is to ensure client availability.
During Files Server upgrades this is also the case.
Installation of Nutanix Files
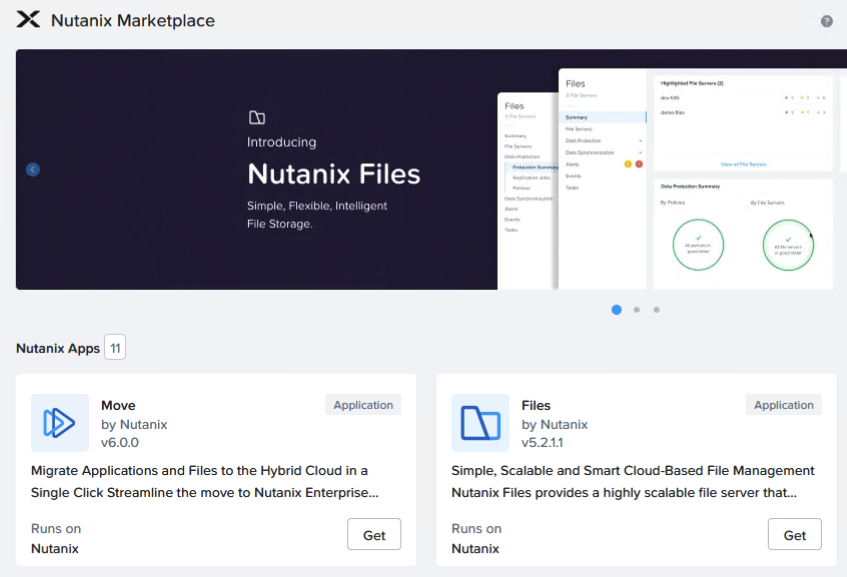
To install Nutanix Files using Prism Central, we do need the Files Manager. We can install that one using the marketplace of Nutanix. Just go the Admin Center in Prism Central and launch the marketplace. If not enabled yet, just enable the marketplace for the costs of only 4 GB of RAM and a few minutes of your time.
Just click Get and on the next screen on Deploy. No input is needed for the installation.
After a couple of minutes the Files Manager is installed and ready to use.
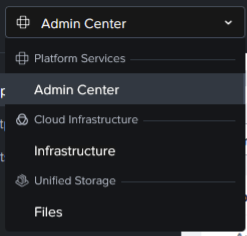
In the dropdown menu, a new option appears. We are able to manage Files from Prism Central from now on.
Just click on Files in this menu.
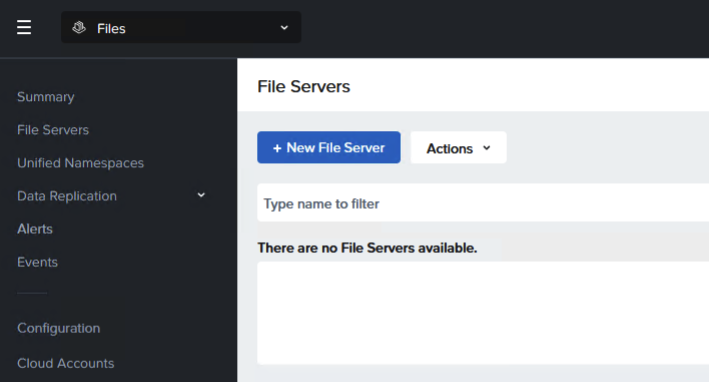
As expected there are currently no File Servers available. Luckily we are able to create a New File Server.
Just be sure a new LCM inventory has been performed. Otherwise No Prism Central versions are found to be installed.
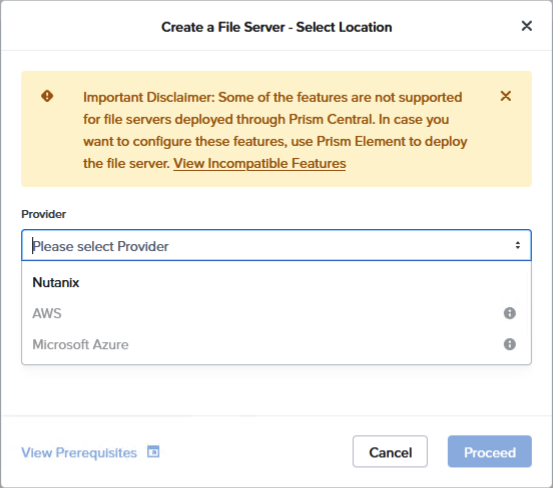
As I have no Cloud Accounts avaiable in this environment, I am only to select Nutanix as a provider.
The unsupported features they are talking about are the following;
- Async DR through Protection Domain
- Metro Availability through Protection Domain
- Enabling File Analytics on File Server
If you need one of those features, it may be wise to select another deployment method.
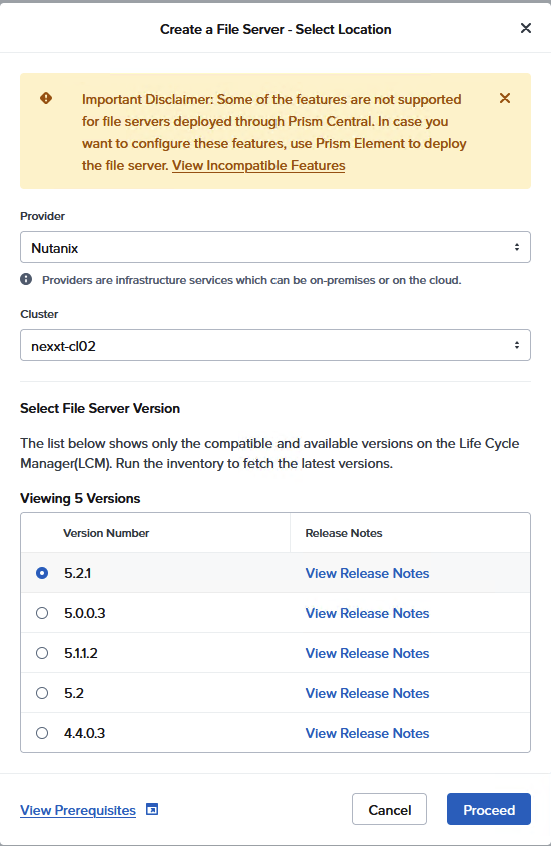
After selecting Nutanix as the desired provider, it is time to make only two choices.
Which cluster do you want to use to install Files on? It may be a dropdown, but in this situation, the choice is limited to one cluster.
Then select the File Server version. (As mentioned before: if the list is empty, just go to LCM and rerun the inventory of Prism Central.
In this case, version 5.2.1 will be installed on the cluster.
Click ‘Proceed’ for the next tab.
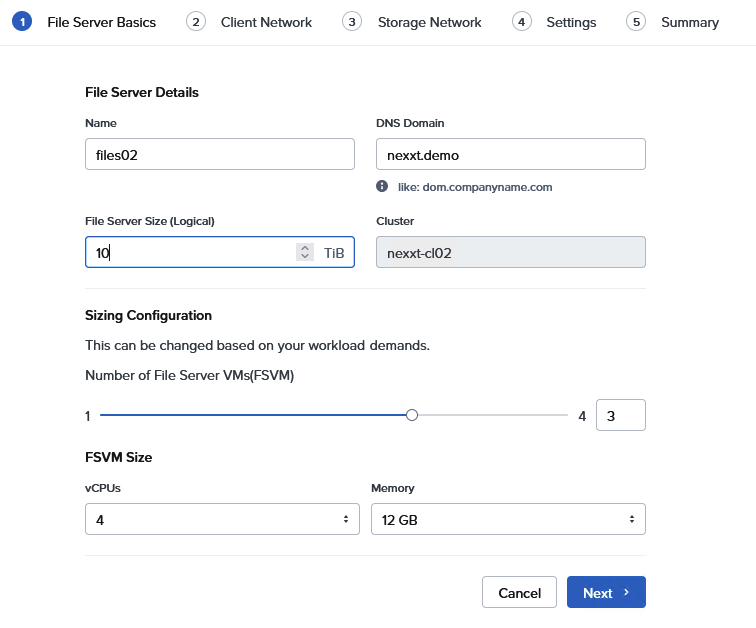
On the new wizard step 1, a few details has to be supplied for the new File Server.
What is the name of the fileserver and what will be the DNS domain?
As mentioned earlier, this combination will be registered into DNS in a post-deployment step.
You have to specify the size of the fileserver. The numbers of TiB entered here must be licensed afterwards.
Depending on your workload you can spcify the number of FSVMs and the size of the VMs. (In a later post, I will give some more details about sizing Nutanix Files.)
The number of FSVMs is limited to the number of physical nodes in the cluster.
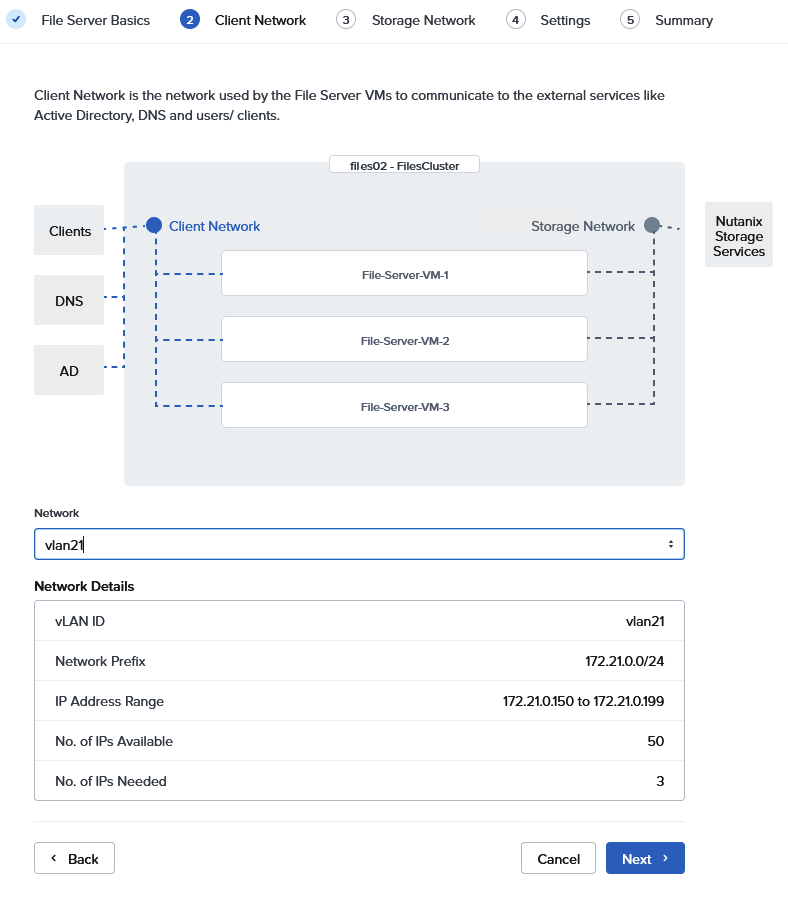
Second, you have to select the network that you want to use for external communications. This may be Active Directory / DNS related, but also backup traffic is using this network.
The network I selected is using Nutanix IPAM. There is no need to enter IP adresses. If no pool is defined (External IPAM), you have to specify the IP adresses for the FSVM.
Each Fileserver VM needs 1 IP in the Client network.
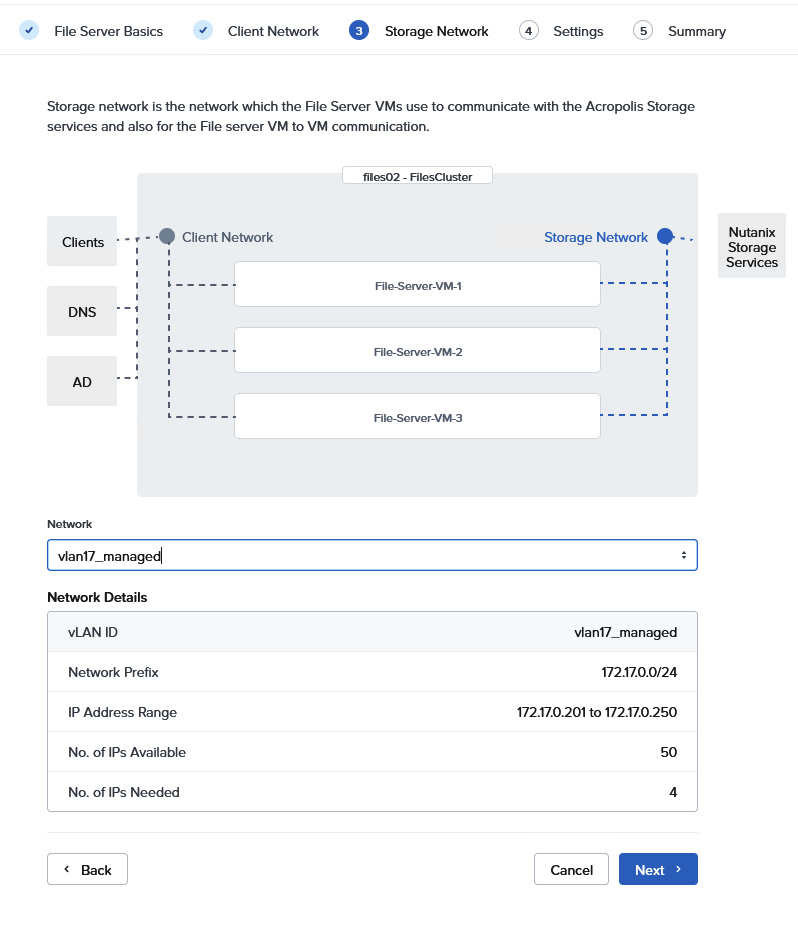
Next page is for the configuration of the storage network. The File Server VM is using this for communication with the Controller VM for the storage.
This network is also used for communication between the File Server VMs.
We need an IP address per FSVM and one additional per File Server. In the case of three FSVMs, we need thus 4 IP adresses in this network.
If the IP addresses are not managed by Nutanix, then you have to specivy the addresses here.
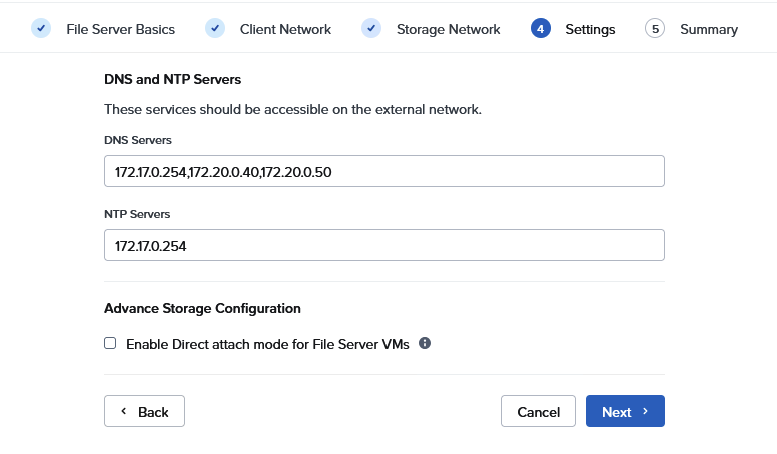
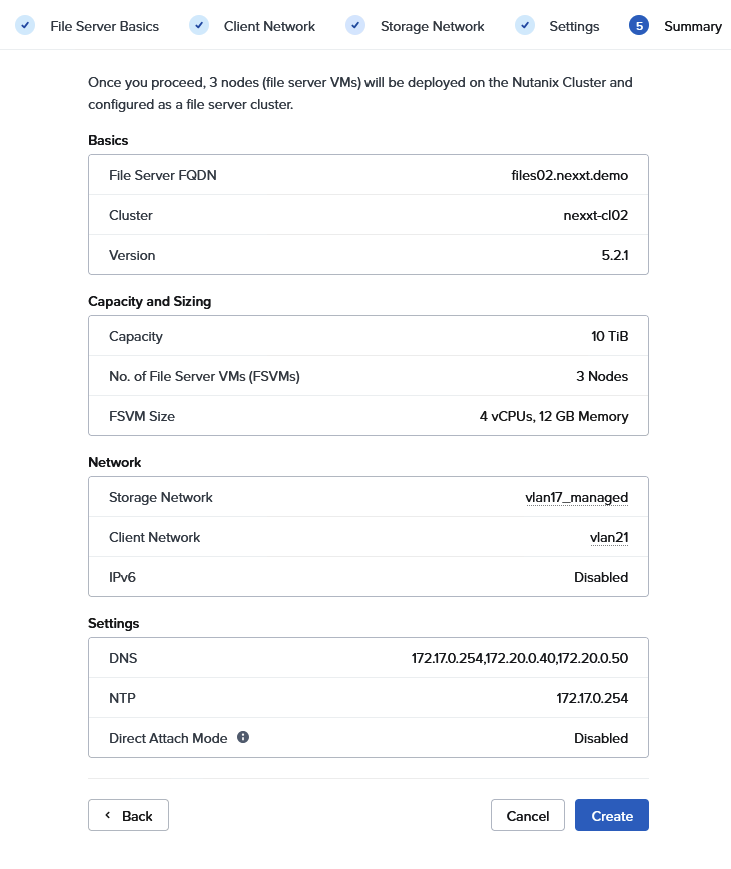
DNS and NTP are important. Settings do come from the Nutanix cluster. Just check them if they are appropiate for the Files Instance.
A quick overview of the configuration. If all is okay, we are ready to click ‘Create’.
Then the File Server is deployed. It will take about 20 minutes to finish the deployment.
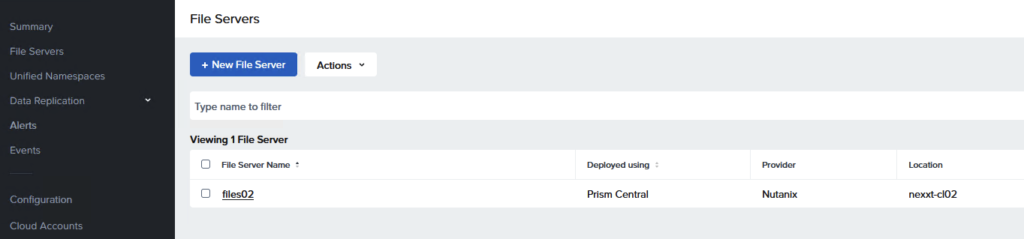
When deployment is finished, we have a File Server to manage!
Conclusion, it is not hard to deploy a new Nutanix File Server using Prism Central. Good part of the job is that a new deployment in AWS or Azure will be just as easy as this. There are a few more requirements for deployment in a public cloud. I will cover that in a future post.
Next Post will be about some post-deployment steps to finish the configuration of Nutanix Files.
Leave a Reply