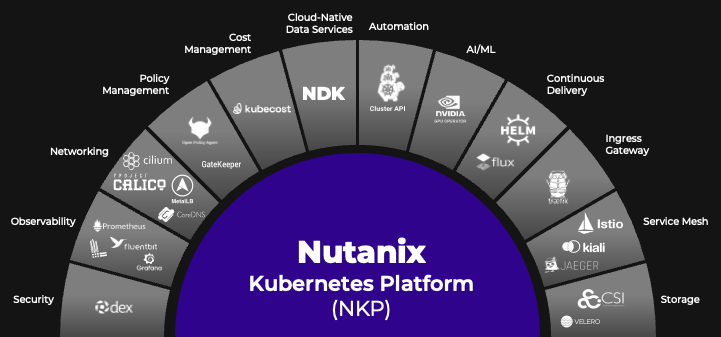
Information about Nutanix Kubernetes Platform (Part 4 of many)
To deploy containerized workloads, you have to add at least one Kubernetes cluster to NKP. As said before you can add a managed cluster, as well as an attached cluster. An attached cluster itself is not managed by NKP. Only the workloads are managed. To get full functionality out of NKP, you should add a managed cluster. This article describes the workflow to create a managed cluster on Nutanix infrastructure. As you may know, you can also create clusters on AWS, Azure, GCP as well as EKS and AKS.
How do you create a fully functional Kubernetes cluster on a Nutanix infrastructure. Assumption here is that all required networks are already present within the cluster and Prism Central.
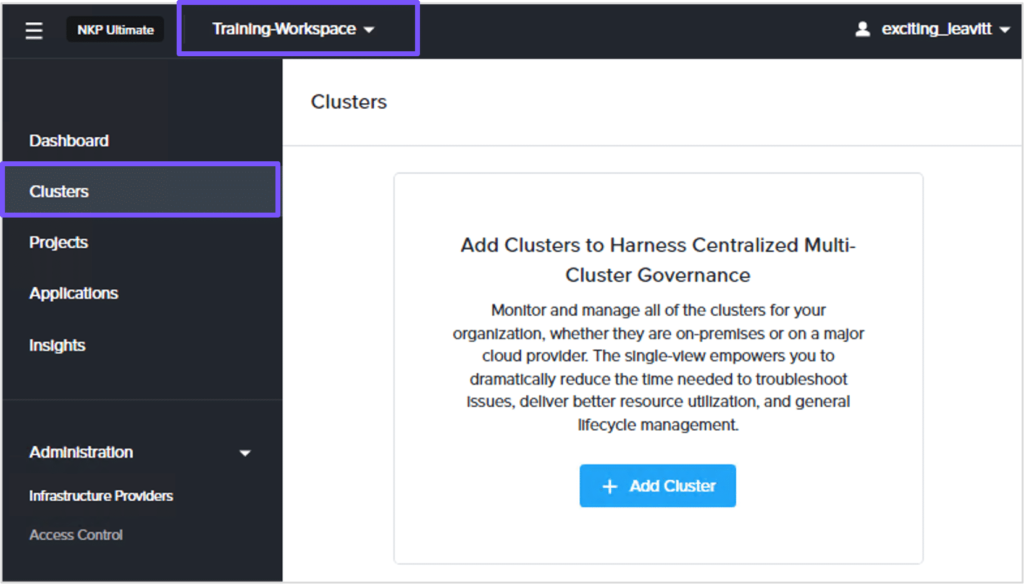
Navigate to the “Clusters” section on your dashboard and then click “+ Add Cluster“.
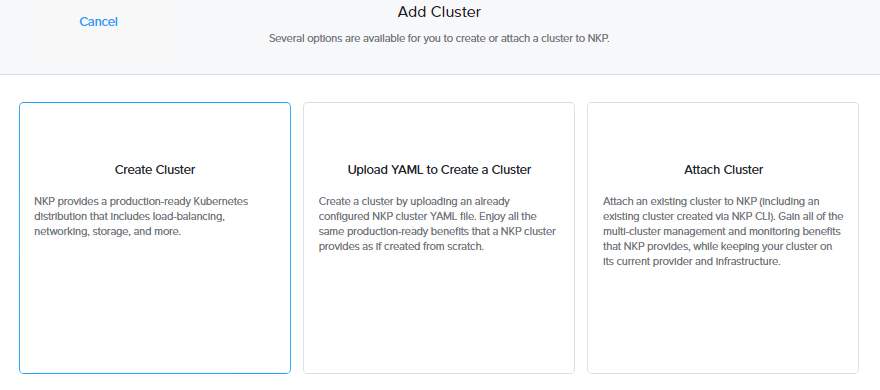
After this you have several options. In the new dialog window you can attach an existing cluster to NKP, so you can manage and monitor this cluster from NKP. You have also an option to upload a YAML file. This file contains all the settings for the Kubernetes cluster to be installed. In this post a cluster is created using the UI. So we click “Create Cluster“
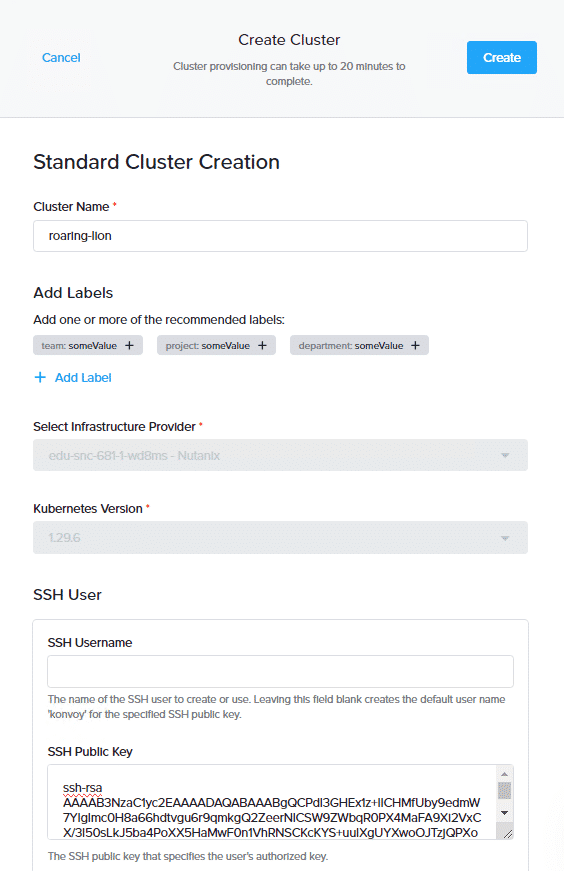
In the “Create Cluster” window, you have to enter a name for the cluster and you can add labels that are needed for the environment. In the picture below, the Infrastructure Provider is greyed out, as only 1 provider is available to NKP. When multiple infrastructure providers are available, a dropdown list is shown. In the ssh section you can provide the username as well as a SSH Public Key.
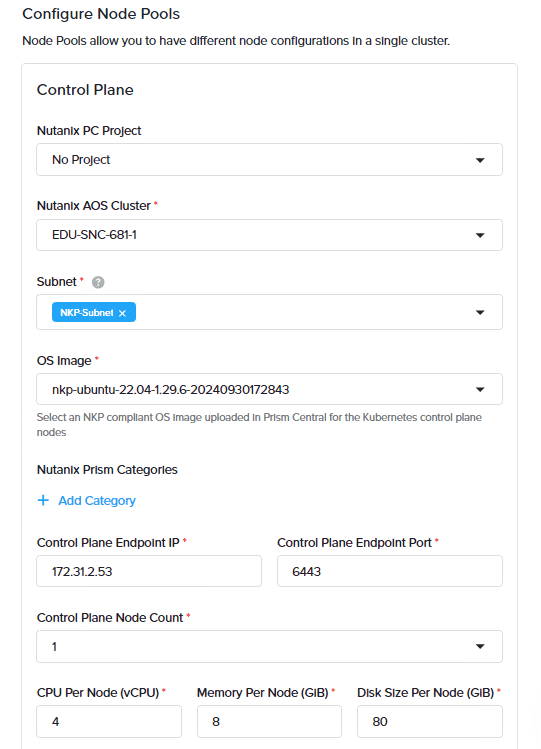
In the “Configure Node Pools” sections you have to provide some information. If you want to assign a Prism Central Project, you can select this project here. You define the Nutanix OAS cluster to run on, as well as the subnet and the OS image.
Provide the Control Plain Endpoint IP and the port you wnat to use. Port 6443 is the default port. Select the number of Control Plane nodes you want to add. Define the number of vCPU, RAM and storage size for the Control Planes nodes.
When you select a project, AOS cluster, subnets, and images in the control plane section, these selections will automatically populate the worker node pool section. This eliminates the need to input the same information twice manually. However, if desired, you can modify these selections for the worker node pool.
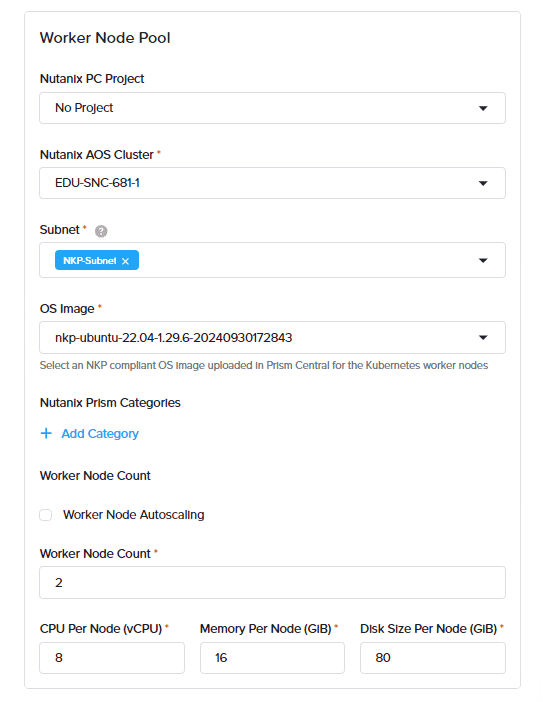
You also have to configure the “Worker Node Pool“. Configuring the Worker Pool is more or less the same as for the Control Plane Pool. We only have a Autoscaling feature for the “Worker Node Pool”. If autoscaling is enabled you have to specify the minimum and maximum numbers of nodes you want to use.
If autoscaling is enabled, the API server checks every 10 seconds (configurable with the –scan-interval flag) for any unschedulable pods. If the cluster is unable to schedule the pods an extra worker is created and added to the pool. If no scale-up is needed the Cluster Autoscaler checks if worker nodes are unneeded. If a node is unneeded for 10 minutes, the node is terminated. (More information can be found here.)
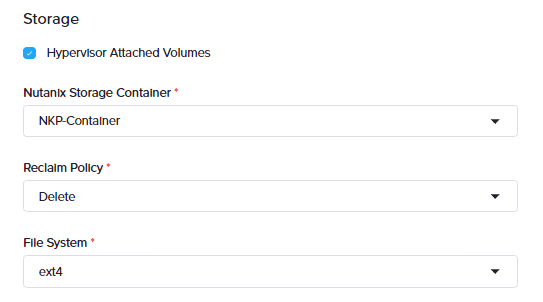
The next section is for configuring the “Storage“. In the Storage Section you have the option to enable “Hypervisor Attached Volumes“. With this option enabled, volume groups will be attached to the worker or control plane nodes. Storage is allocated on the configured AOS storage container. The use of Volume groups provides additional functionality, such as replication.
You can also set the Reclaim Policy. Here you define if tou want to retain or delete the volume groups if the cluster is deleted.
For the File System selection, you have two options with Kubernetes. You can choose ext4 or xfs. Check this post for more information.
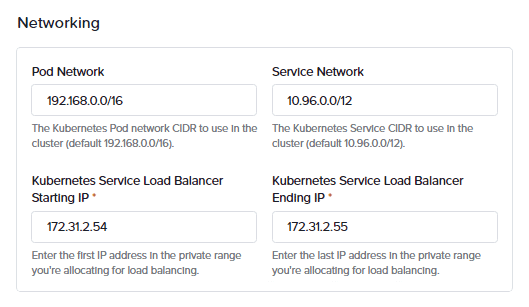
In the Networking section, enter the Kubernetes pod and service CIDR and Kubernetes service load balancer starting and ending IPs.
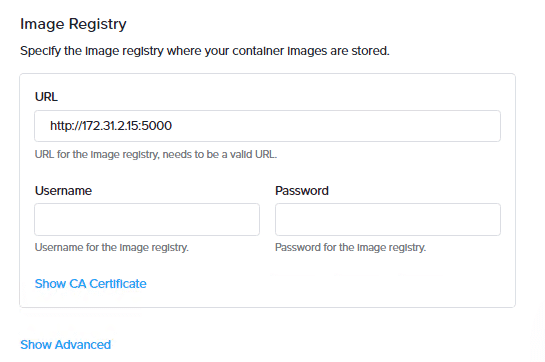
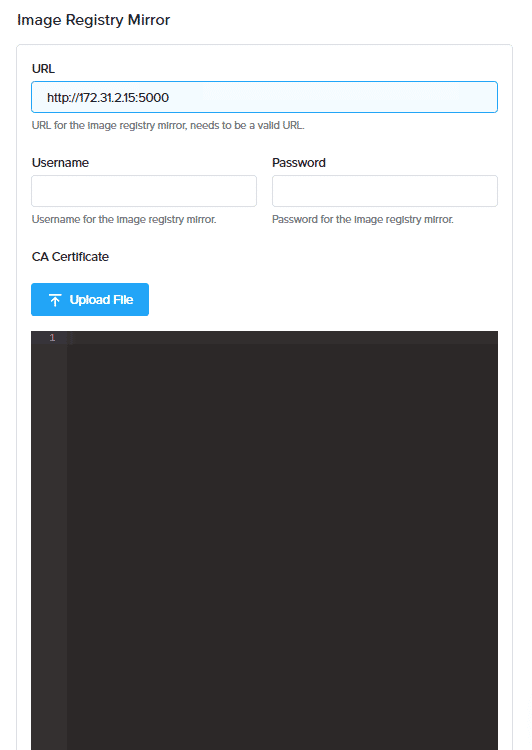
In the Image Registry section, you need to specify the details of the image registry where your container images are stored. As an advanced option, you can additionally configure an image registry mirror. Provide the image registry URL, credentials, and CA certificate.
With all these information, you are ready to click Save and create this managed cluster. It can take up to 20 minutes to create the cluster.
Leave a Reply