Information about Nutanix Kubernetes Platform (Part 6 of many)
Now we are familiar with adding Identity Providers to NKP, it is good to know how things are working together. With NKP you are able to manage access centrally across clusters. You are able to define role-based authorization to control resource access on the management cluster for target clusters.
These resources are more or less the same as the Kubernetes Role Based Access Control, but there are big differences. They make it possible to define the roles and role bindings once and federate them to clusters within a given scope.
The NKP UI has two conceptual groups of roles that are used to manage access control.
- Kommander Roles: control access to resources on the management clusters.
- Cluster Roles: control access to resources on all target clusters.
These groups can be used to manage access control within three levels of scope.
| Environment Context | Kommander Roles | Cluster Roles |
|---|---|---|
| Global: manages access to the entire environment | Create Cluster Roles on the management cluster | Federates Cluster Roles on all target clusters across all workspaces |
| Workspace: manages access to clusters in a specific workspace | Create namespaced Roles on the management cluster in the workspace namespace | Federates ClusterRoles on all target clusters in the workspace |
| Project: Manages access for clusters in a specific project | Create namespaced Roles on the management cluster in the project namespace | Federates namespaced Roles on all target clusters in the project in the project namespace |
More information can be found in the Access Control section of the NKP Guide.
Granting Access to Kubernetes and Kommander Resources
Access can be granted to Kommander and Kubernetes resources using RBAC. Adding an Identity Provider to NKP does not grant any access by default. Privileges are granted explicitly by interacting with the RBAC API.
NKP does not have an internal identity database, so a trusted identity provider must provide users and group membership. Then, you can grant access by binding a subject (user, group, or service account) to a role, which grants some level of access to one or more resources. Kubernetes ships with some default roles, which aid in creating broad access control policies.
More information can be found in the Access to Kubernetes and Kommander Resources section of the NKP Guide.
The cluster-admin role is a system role that grants permission to perform all actions on any resource, including non-resource URLs. The default dashboard user is bound to this role.
Granting a user administrator privileges on /nkp/* grants admin privileges to all sub-resources, even if the bindings exist for sub-resources with fewer privileges.
More information about Default Roles can be found in the NKP guide.
Binding a Role to a User or Group
Kommander roles, cluster roles, and project roles can be used to associate a Kommander group with any number of roles. This process is called role binding. All groups (user and group) defined in the Groups tab on the Identity Providers page are present at the global, workspace, or project levels and can be used to assign roles to them.
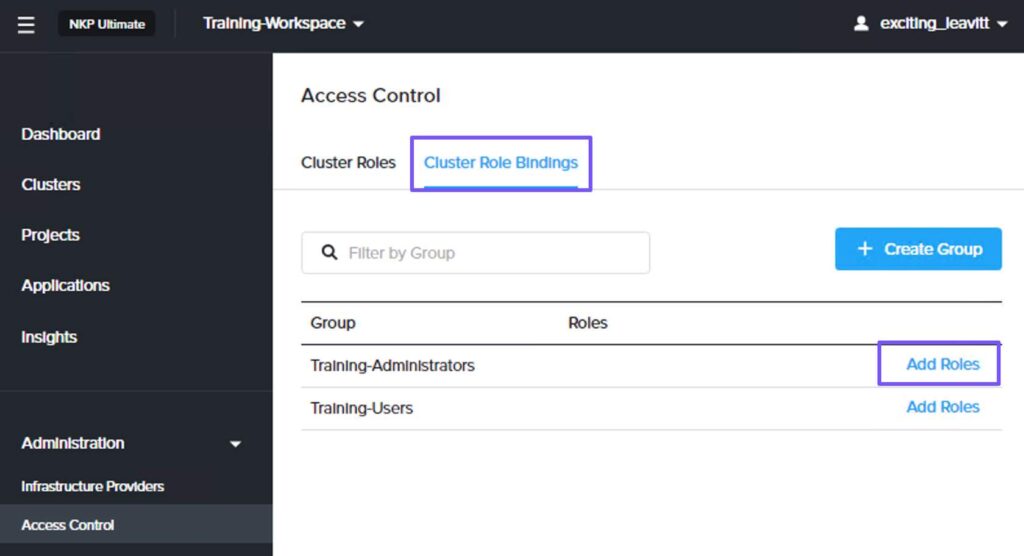
On the workspace dashboard, select Access Control from the left pane. On the Access Control page, select the Cluster Role Bindings tab and select a group and click Add Roles.

On the Edit Role Binding window, you can select a default or a custom role to bind. In this example, we will select a default role, Kommander Workspace Admin Role from the Roles drop-down list and click Save.
More information about Role Bindings can be found in the NKP guide.
Working with roles
By default, users are granted the Kommander workspace admin, edit, or view roles. These roles are inherited by all the projects created in the workspace. Other workspace roles are not automatically propagated to the equivalent role for a project in the workspace.
If you want to propagate workspace roles automatically, you have to use an annotation on a KommanderWorkspaceRole. This can be done only by using CLI. See also the documentation of NKP.
Run the command kubectl get kommanderworkspaceroles -n <WORKSPACE_NAMESPACE>.

To prevent propagation of the kommander-workspace-view role, remove this annotation from the KommanderWorkspaceRole resource.

To enable propagation of the role, add this annotation to the relevant KommanderWorkspaceRole resource.

Configuring a workspace role
You can override a workspace role for a project by creating a specific project role with fewer permissions. The first three steps are for creating the workspace role. The next 3 steps creates the project role.
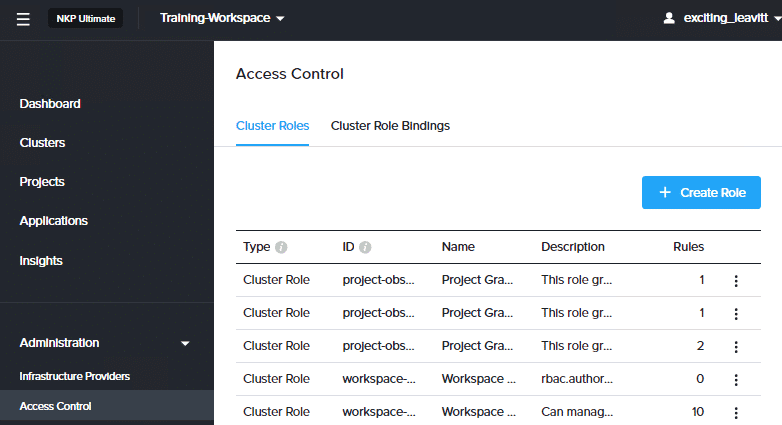
On the workspace dashboard, select Access Control from the left pane. In the Access Control page, on the Cluster Roles tab, click + Create Role.
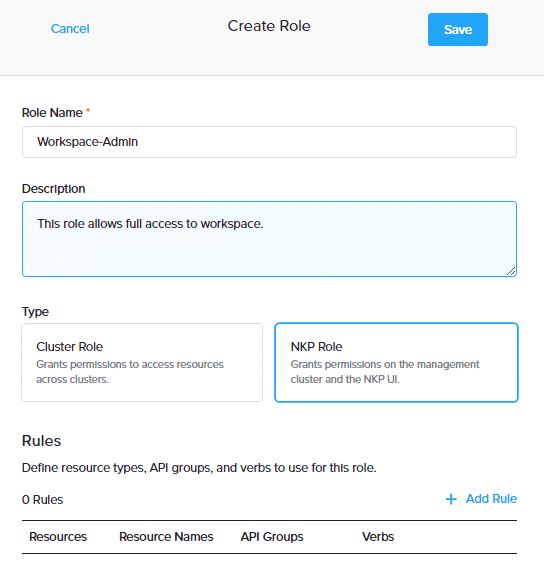
On the Create Role page, enter a name and description. Select either Cluster Role or NKP Role as the type. Selecting Cluster Role provides access to resources across the cluster exclusively via the CLI. Selecting NKP Role provides access to the management cluster and NKP UI. In this example, since we want to grant the role UI access, we will select NKP Role. Then, click the + Add Rule link to set rules.
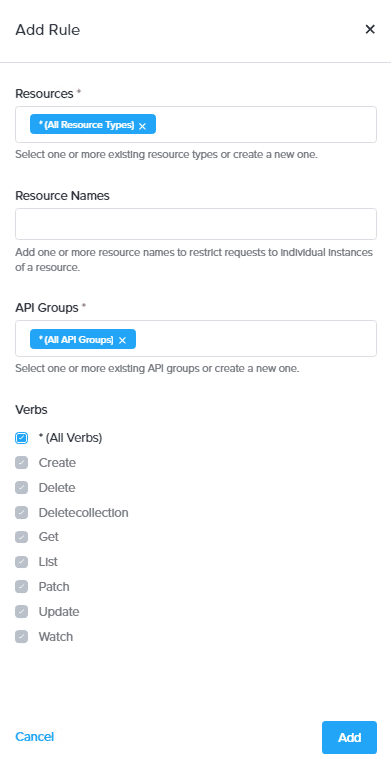
In the Add Rule dialog box, select All Resource Types and select All Verbs to provide full access to the resources in the NKP UI and click Add.
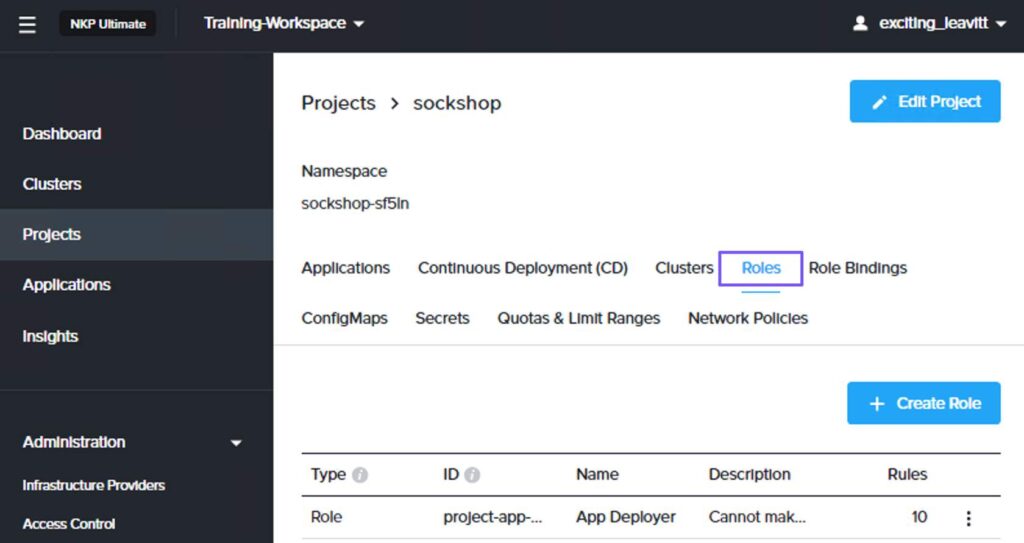
On the workspace dashboard, select Projects from the left pane. In the Projects page, select a project and click the Roles tab. Then, click + Create Role.
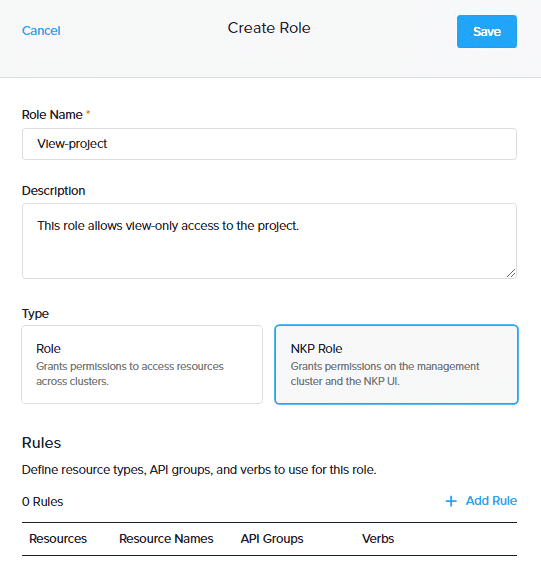
On the Create Role page, enter a name and description. Select either Cluster Role or NKP Role as the type. Selecting Cluster Role provides access to resources across the cluster exclusively via the CLI. Selecting NKP Role provides access to the management cluster and NKP UI. In this example, since we want to grant the role UI access, we will select NKP Role and click the + Add Rule link to set rules.
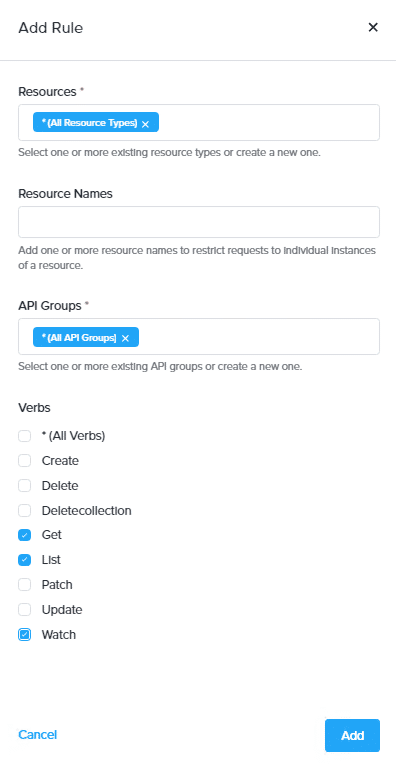
In the Add Rule dialog box, select projects from the Resources drop-down list. Provide a specific project name in Resource Names. Then, since we want this role to have read-only access to the project, select the verbs Get, List, and Watch. Finally, click Save to create the project role.
Leave a Reply